Add and setup a new container
If you have any problems with the steps outlined on this page or need help with any of the steps, please contact support@bintel.se.
Adding a new container
- Navigate to the Containers page.
![]()
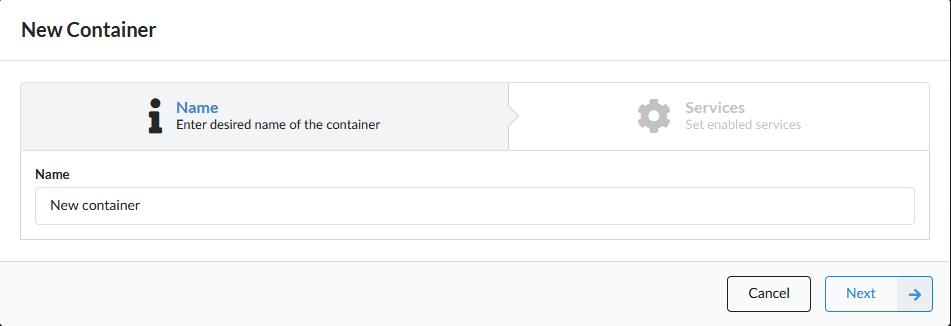
- Press the "Add Button".

- Write a unique name for your container.
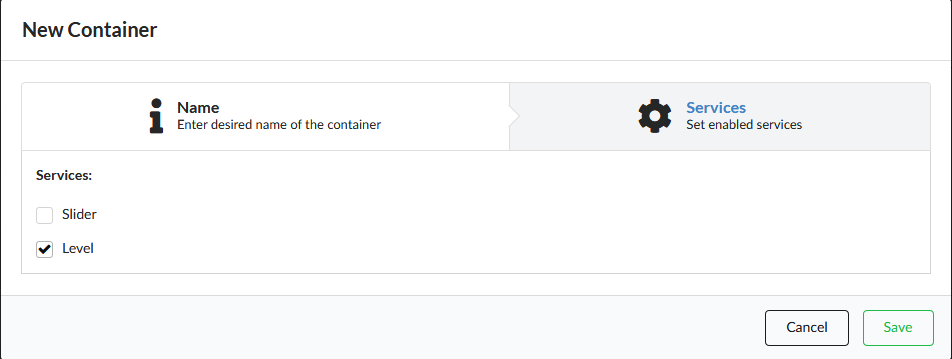
- Select which services you want activated for the container, select "Slider" if you are going to install a bintel Slider sensor on the container or select "Level" if you are going to install a bintel Level sensor.
Connect a bintel sensor to the container
You need to connect a sensor to the container for it to start getting data from the sensor.
- Press "Add Device" on the container screen.

- (Optional) Filter based on Slider or Level.
- Search for your sensor using the bintelId on the front of your device.
- When a sensor is selected press "Add".

Now you containers is ready to receive data from the sensor.
Add container type and waste fraction
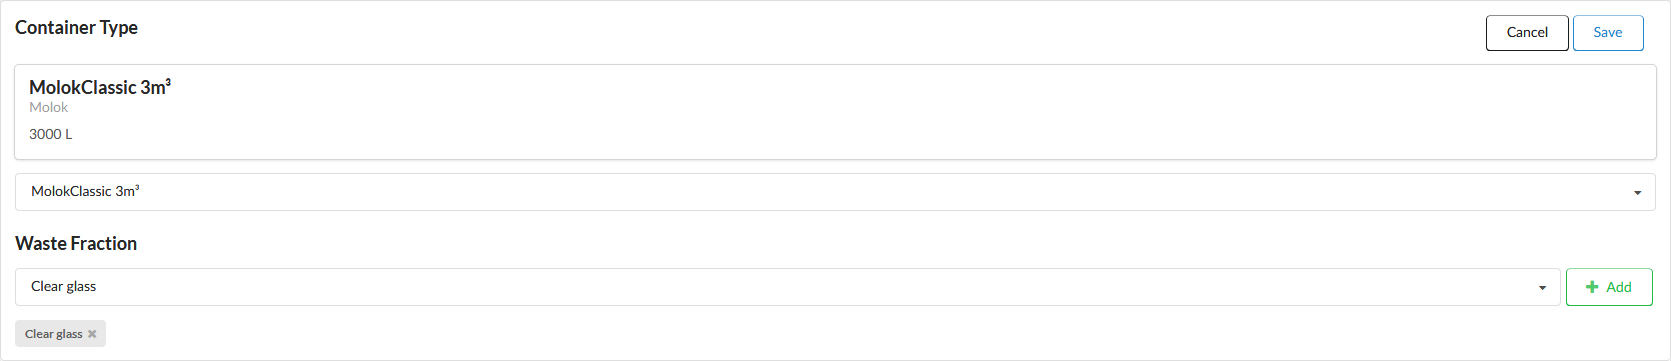
To be able to determine the fill level of the container, bintel portal needs to know what type of container it is and what fractions are inside.
- In the dropdown named "Container Type", select the type of container you want to assign the container.
- In the dropdown named "Waste Fraction", select the fraction you want to add to the container.
- Press "Add" to the right of the "Waste Fraction" dropdown to add it to the container.
- (Optional) Add more fractions by selecting a fraction in the dropdown and press "Add".
- When you are done, save both the Container Type and the Waste Fractions by pressing "Save" in the top right corner of the box.
If you are missing a Container Type or Waste Fraction, please contact support@bintel.se
Add location and coordinates data
If you want your container to show up on the "Overview" page and be able to locate your container you need to add a location. This can be done in two ways, by adding a "Location" or by assigning Longitude and Latitude coordinates.
Add Location
- Select one of your saved Locations in the dropdown.
- Press save in the bottom right corner of the box.

Add coordinates
- To use your current position, press "Use current position". To pick a position on a map, select "Pick position on map".
- (Optional) Manually enter coordinates.
- Press "Save" in the bottom right corner of the box.
